Posts mit dem Label Dessert werden angezeigt. Alle Posts anzeigen

Samstag, 11. Juli 2015

Black and White Raspberry Cake


I created this cake for the birthday of a friend. But then I got sick and couldn't make it. I was pretty sorry about it. But since I already planed it out I thought it would be a pity not to bake it anyway. As it happens my dads birthday was the following weekend. So I got my chance.

I think of all the cakes I made in the last few years this is my favorite. At least considering the taste. I mean the combination of dark chocolate and raspberrys is always delicious.
The Frosting is absolutely mouth-watering. The taste of chocolate is quite rich and intense. Even the texture is perfect for coating a cake. YAY!


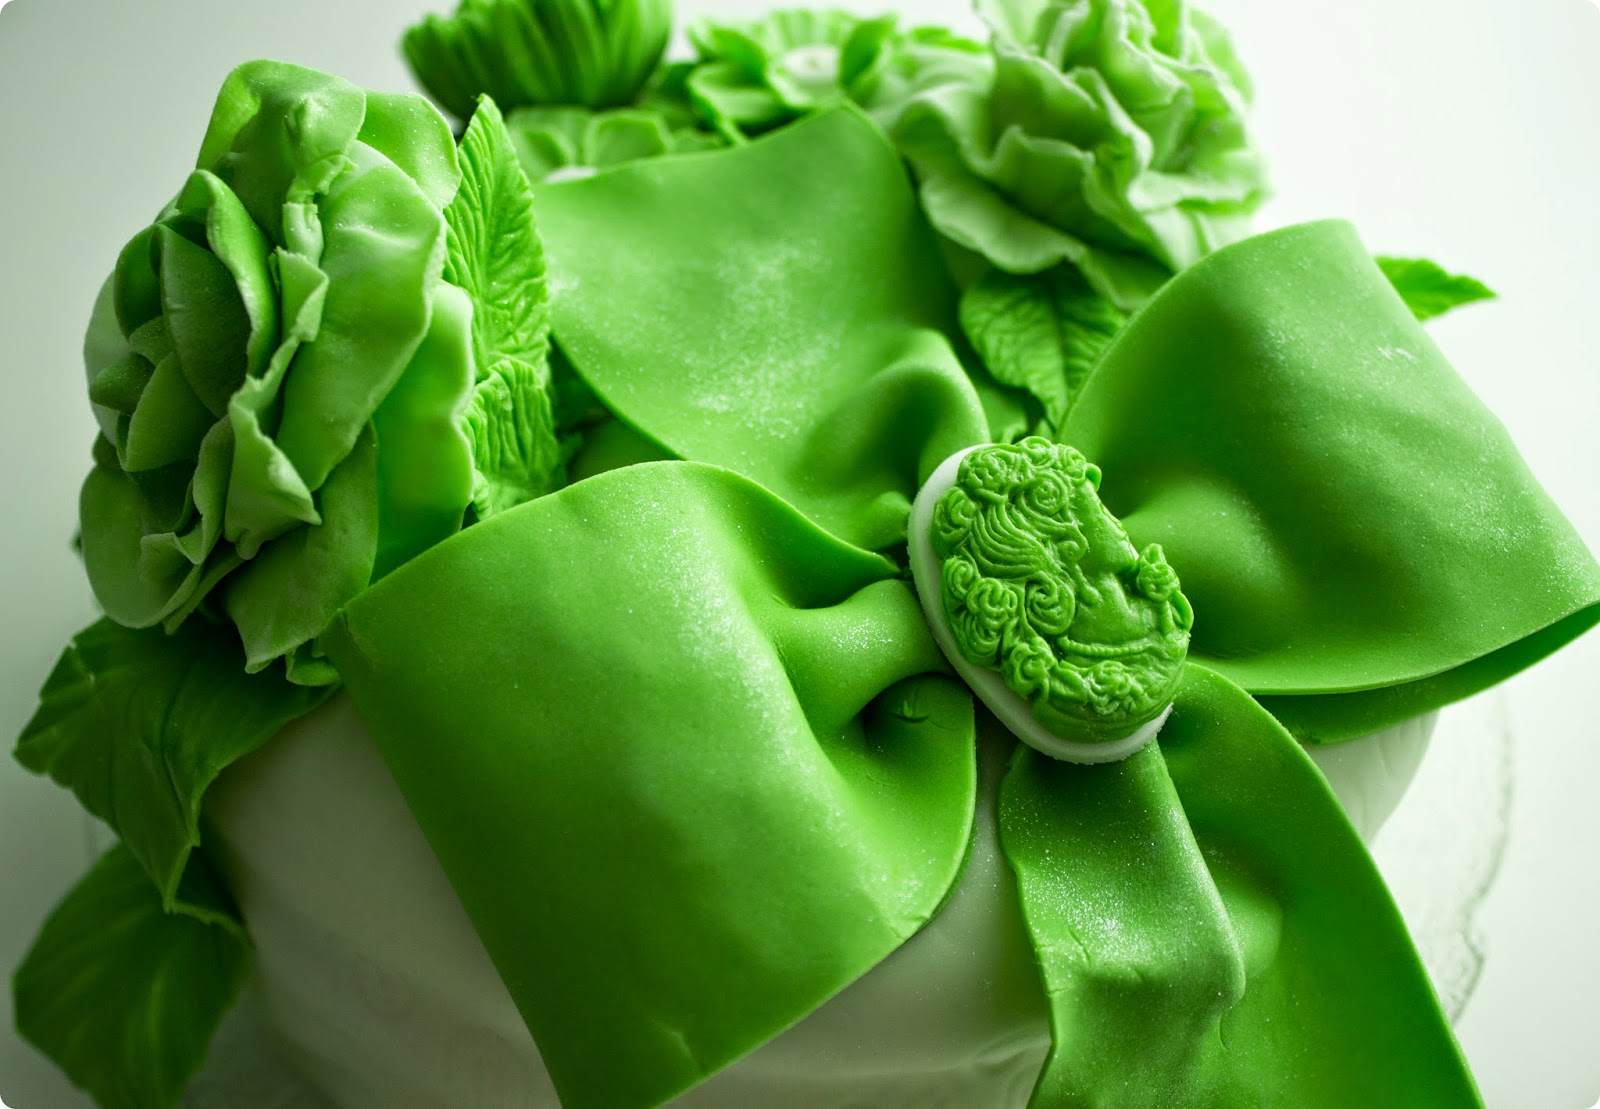
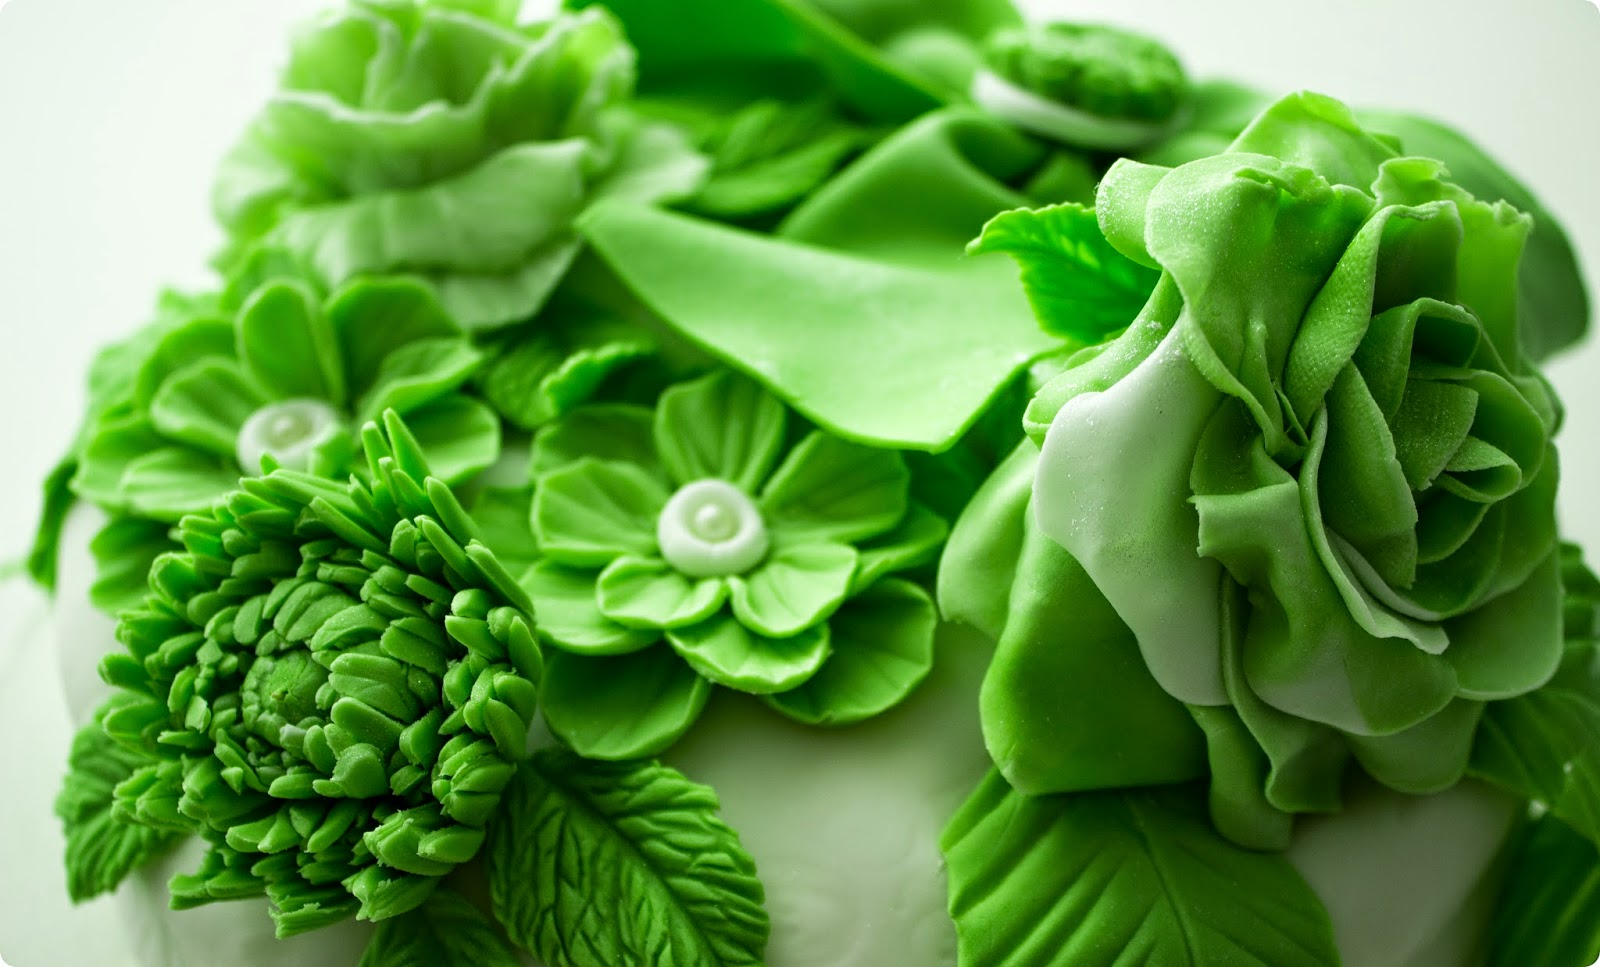
I wanted the flower to be a certain turquoise shade. It's not that easy to accomplish. To get closer to that shade, I had to use a lot of gel colour. As a result the gum paste became to sticky. To counteract that I had to use more cornstarch while I rolled it out. Thats why the flower has this light white coating. It's a pity.
I planned for the flower to be a little more fluffy. But the fondant was too damp and it softened the gum paste petals. They all just deflated. I was pretty disappointed.

_____________________________________________________


Black and White Raspberry Cake

Shortcrust

85 g butter, room temperature
1/4 cup sugar
2/3 cup flour
1 tsp vanilla extract
8 g vanilla sugar
1/8 tsp salt

1. Pre-heat the oven to 180°C/360°F.
2. Beat the butter, the vanilla sugar and the sugar with a hand mixer until it's pale and creamy.
3. Add the flour, the vanilla extract and the salt. Mix it in with a dough hook.
4. Take a baking pan but leave out the bottom.
5. Put baking parchment on a baking sheet. Place the ring of the baking pan on top. Crush the edges of the parchment around the ring.
6. Spread the dough evenly in the prepared baking pan.
7. Bake it for 15 minutes.
8. Put the baking pan on a cooling rack and let it cool down to room temperature.

Biscuit

150 g flour
38 g cornstarch
188 g sugar
315 g eggs (with shell)
1 pinch citric acid powder

1. Weigh the eggs with the shell. Try to come as close to the intended weight as you can. That works best with a mix of medium and large sized eggs.
2. Separate the egg whites from the yolks.
3. Put the egg whites in a tupperware container, close it. Put the container in the freezer. Leave it there until the egg whites are a little bit frozen on the edges. This can take from 15-50 minutes. You should check every 5-10 minutes.
4. Beat the egg yolks with a hand mixer until they turn pale. Put a piece of saran wrap directly on the beaten yolk. Put the bowl in the fridge for later.
5. Mix the flour with the cornstarch. Sieve the mixture at least twice. Leave the flour in the sieve for later.
6. Put the sugar into a small bowl and leave it for later.
7. Take the baking pan with the baked shortcrust and put a cake-strip around it. Put it back on the baking sheet.
8. Pre-heat the oven to 155°C/310°F.
9. Prepare the flour, the sugar, the yolk and a timer for easy access.
12. Put the citric acid powder in a big bowl.
13. Add the egg whites.
14. Whip the egg whites manually. Preferably use a spiral whisk or a normal whisk, if you don't have one. It's important that you don't turn the bowl while you whip the eggs and you always have to beat in the same direction. Basically you have to repeat one hand movement the whole time.
15. After 10 minutes start gradually adding the sugar. Overall the egg whites should be whipped for 25 minutes.
16. Afterwards add the egg yolk.
17. Sieve half of the flour to the whipped egg whites. Fold them in carefully but quickly. Sieve in the remaining flour and fold it in too. Like with the egg whites you should not turn the bowl and fold in the same direction. Try to work quickly but always be careful.
18. Put the batter over the shortcrust. Smooth out the top as good as you can.
19. Bake for 50-60 minutes. When you press the top carefully with a finger and it jumps back, the biscuit is finished.
20. Put the baking pan on a cooling rack and leave it to cool down completely.
21. Remove the parchment. Afterwards use a thin knife to carefully cut the biscuit out of the pan.

Chocolate Batter

85 g butter, room temperature
1/6 cup cacao
1/8 cup water, boiling
1/2 cup sugar
8 g vanilla sugar
1 egg
3/4 cup flour
1/2 tbsp cornstarch
1/4 tsp baking soda
1/8 tsp salt
1/4 cup milk

1. Sift the cocoa powder and whisk in the boiling water.
2. Beat the egg lightly.
3. Combine the flour, the cornstarch, the baking soda and salt. Sift it all together.
4. Cream the butter with a hand mixer until it's light and fluffy.
5. Gradually beat in the sugar and vanilla sugar. Beat it for about 3-4 minutes, scrap the batter twice from the sides of the bowl.
6. Gradually add the egg and mix it well.
7. Add the milk to the cocoa and mix it.
8. Add the flour and cocoa mixture alternately to the batter. Start and finish with the flour.
9. Pre-heat the oven to 180°C/360°F.
10. Grease the baking pan and dust it with cocoa powder. If you want to use a Cake strip, put it on the baking pan.
11. Bake the cake for ca. 30-35 minutes.
12. Put the baking pan on a cooling rack for about 10 minutes. Afterwards take the cake out of the pan and leave it to cool on a cooling rack.


Chocolate Frosting

2 cups powdered sugar
1/4 cup cacao
190 g cream cheese
180 g butter, room temperature
280 g bittersweet chocolate
3/4 cup crème fraîche
2 pinches salt

1. Combine the sugar, the cacao and the salt in a bowl. Sift them together.
2. Use a hand mixer to beat the butter until it's creamy.
3. Add the cream chesse to the butter. Mix them together.
4. Set the mixer on slow and add the sugar-cacao mix.
5. Melt the chocolate. Let it cool down a little.
6. Add the chocolate and mix it in. Still on a slow setting.
7. Add the crème fraîche. Mix it in.

To Assemble

1-2 cups raspberrys
Raspberry jam

1. At the top of the biscuit cut of about one third.
2. Take it of and place it on a cutting board. Cut out a circle. Leave a 2cm rim. The cut out middle is superfluous and can be eaten as a snack.
3. Spread some jam on the cut surface of the bigger biscuit.
4. Place the cut ring back on the biscuit.
5. Wash the raspberrys. Carefully dab them dry.
6. Fill the cut out middle with the raspberrys.
7. Spread some of the chocolate frosting onto the biscuit. At this point it's better if the frosting is rather soft, so don't put it in the fridge beforehand.
8. Place the chocolate base on top.
9. Cover the whole cake with chocolate frosting. If the frosting is too soft. Put it in the fridge, check about every 5 minutes, until it reaches the desired consistency.
10. Covering the cake with fondont is optional.


Bon appétit!!

Freitag, 26. Juni 2015

Kiwi-Coconut Cupcakes


It's been a while since I last made sweet muffins. At the moment I don't really remember why I chose this recipe. I think it was because of the coconut. I have a vague memory of wanting to try out whipping coconut milk as a substitute for whipped cream. Well obviously I didn't actually do that.

This muffins gave me a chance to try out my homemade lime extract. I liked them. They were just a touch too simple for me. When or if I make them ever again I really have to pimp them up a little. Maybe some kind of filling or core or even a different topping. We will see.

_____________________________________________________


Kiwi-Coconut Cupcakes

2 cups flour
1/2 cup sugar
1/2 cup desiccated coconut
90 g butter
1 cup buttermilk
1 egg
2 tsp lime zest
2 tsp lime extract
3 tsp baking powder
1 tsp salt
3 kiwi

1. Grate the zest of the lime.
2. Combine in a big bowl the flour, the sugar, the coconut, the baking powder, the salt and the lime zest with a spatula. Form a well in the middle.
3. Melt the butter.
4. Use a whisk to mix the butter, the buttermilk, the egg and the lime extract in a bowl.
5. Peel the kiwi and cut it into thin slices. Leave it for later.
6. Pre-heat the oven to 200°C/390°F.
7. Put paper muffin liners into the molds of the muffin pan.
8. Pour the wet ingredients into the formed well. Use the spatula to combine everything.
9. Distribute the batter between the muffin liners.
10. Place one or two of the kiwis on top of the batter.
11. Bake the muffins for 20-25 minutes.
12. Take the muffins out of the pan and let them cool down on a cooling rack.


Bon appétit!!

Sonntag, 24. Mai 2015

Raspberry-Lemon Biskuit Cake


I made this cake for my grandmas birthday. I had this idea about combining lemon and raspberry in a cake. If you look at most of my cakes I think it becomes obvious that I absolutely love my aunt's biscuit. So I used it as the base. And for the raspberry part I chose the raspberry dough from this recipe. And to round it out I would make a lemon frosting.
It didn't work out as I planed. I hate buttercream frosting, so I chose a cream cheese frosting. It was the first time I made that recipe. It was horrible. For one it was too sweet, but I could have lived with that. But the real problem was that it was too runny and it didn't get better when I put it in the fridge for some time. It just run down the cake. I would have made some other cream, but there was no cream cheese leftover. And it was already too late to go and by more. I was really pissed.
So I think it's no surprise that I'm replacing the frosting with one I made before and that actually worked and tasted good.


But it was not all bad. This is the first time that the fondant I made worked out perfectly.
I stumbled over this blog. There I found not only a recipe for fondant that uses only german ingredients. But also one for gum paste. I actually had to make a half an hour long bus trip to a bigger grocery store to get some of the ingredients. But it was worth it, 'couse it was still cheaper than to buy it online.
And like I said the fondant was great, just the right texture. The cake would have been beautiful. Smooth and even. The cream totally ruind it. I was kinda sad.


There are a few drawbacks to this recipe.
For one the syrup used for it is too dark. It results in an off-white fondant. For another it's a little too soft. So I don't think it's suitable for shaping.
If you make the gum paste, the problem with the shaping disappears. But if you don't plan to color it you get another problem. Because the gum paste is a pure white. The differene between the fondant and the gum paste will be obvious. 


It was the first time I worked with gum paste. I'm pretty happy with the result.
The flowers look really beautiful. They weren't perfect but for a first try still pretty good. But the work is rather elaborate. The gum paste dries fast. So I could only work on one or two petals at a time. And everytime you have to take the gum paste out of the plastic wrap, cut of a piece, put the rest back, roll out the cut of piece, stamp out the petals, put the spare gum paste back, work on the pestals and then do it all over again. I think I worked over one hour on the rose alone.
But the result was worth it.


Usually I don't put up so many picutres. But well I am rather proud of my accomplishment and wanted to show it from all sides. It would have been too hard to chose only two or even three pictures.


_____________________________________________________


Raspberry-Lemon Biskuit Cake

Biskuit

150 g flour
38 g cornstarch
188 g sugar
315 g eggs (with shell)
1 pinch citric acid powder

1. Weigh the eggs with the shell. Try to come as close to the intended weight as you can. That works best with a mix of medium and large sized eggs.
2. Separate the egg whites from the yolks.
3. Put the egg whites in a tupperware container, close it. Put the container in the freezer. Leave it there until the egg whites are a little bit frozen on the edges. This can take from 15-50 minutes. You should check every 5-10 minutes.
4. Beat the egg yolks with a hand mixer until they turn pale. Put a piece of saran wrap directly on the beaten yolk. Put the bowl in the fridge for later.
5. Mix the flour with the cornstarch. Sieve the mixture at least twice. Leave the flour in the sieve for later.
6. Put the sugar into a small bowl and leave it for later.
7. Take a baking pan but leave out the bottom. Put a cake-strip around the pan.
8. Put baking parchment on a baking sheet. Place the ring of the baking pan on top. Crush the edges of the parchment around the ring.
9. Pre-heat the oven to 155°C/310°F.
10. Prepare the flour, the sugar, the yolk and a timer for easy access.
11. Put the citric acid powder in a big bowl.
12. Add the egg whites.
13. Whip the egg whites manually. Preferably use a spiral whisk or a normal whisk, if you don't have one. It's important that you don't turn the bowl while you whip the eggs and you always have to beat in the same direction. Basically you have to repeat one hand movement the whole time.
14. After 10 minutes start gradually adding the sugar. Overall the egg whites should be whipped for 25 minutes.
15. Afterwards add the egg yolk.
16. Sieve half of the flour to the whipped egg whites. Fold them in carefully but quickly. Sieve in the remaining flour and fold it in too. Like with the egg whites you should not turn the bowl and fold in the same direction. Try to work quickly but always be careful.
17. Put the batter into the prepared pan. Smooth out the top as good as you can.
18. Bake for 50-60 minutes. When you press the top carefully with a finger and it jumps back, the biscuit is finished.
19. Put the baking pan on a cooling rack and leave it to cool down completely.
20. Remove the parchment. Afterwards use a thin knife to carefully cut the biscuit out of the pan.
 

Raspberry Batter

1 2/3 cups raspberrys, frozen
2/3 cup sugar
1/2 cup lemon juice, freshly squeezed
2 tbsp lemon zest
2 egg whites
1 egg
1/2 cup flour
1/8 tsp salt

1. Let the raspberrys thaw.
2. Press them through a sieve.
3. Grate the zest of the lemon.
4. Squeeze out the juice.
5. Pre-heat the oven to 180°C/360°F.
6. Place baking parchement into the cake pan. Press it firmly to the edges. Try to make it as smooth as possible.
7. Combine all ingredients in a bowl and whisk them together.
8. Pour the batter into the cake pan.
9. Bake it for 30-35 minutes.
10. Take the pan out of the oven and let it cool down on a cooling rack.
11. When the dough is completely cold, take it out of the pan. Don't yet detach the parchment.
12. Place it in the fridge for at least 3-4 hours.

Lemon Sauce

1/2 cup lemon juice, freshly squeezed
1/4 tsp lemon zest
1 cup sugar
3 egg yolks
3 eggs
1 pinch salt

1. Grate the zest of the lemon.
2. Squeeze out the juice.
3. In a sauce pan combine the juice, the sugar, the egg yolk, the eggs and the salt.
4. On a waterbath bring the mixture to a boil. Stir constantly with a whisk. Cook it for 12-14 minutes.
5. Press the mixture through a fine sieve.
6. Add the lemon zest and mix it in.

Frosting 

250 g cream cheese
60 g butter, soft
1/2 cup icing sugar
1 1/2 tsp lemon extract

1. Whip the butter with a hand mixer until it's smooth.
2. Add the cream cheese and 1/4 of the icing sugar to the butter. Blend everything together with the hand mixer on medium speed.
3. While the hand mixer is still running add the remaining sugar and the extract.
4. Blend the frosting for another 4 minutes.

To Assemble

1. Cut the biscuit in half. Put the top half to the side for later.
2. Spread a little more than half of the lemon sauce on the biscuit.
3. Take the raspberry batter out of the fridge. Carefully detach the baking parchment from it.
4. Place it on the biscuit.
5. Spread about half of the remaining lemon sauce on it.
6. Place the cut of biscuit on top.
7. Spread the remainig lemon sauce on top.
8. Cover the whole cake with the frosting.
9. Decorating the cake with fondant is optional.


Bon appétit!!

Sonntag, 3. Mai 2015

Easter Egg Mini-Cakes II


Last year the Easter Egg Mini-Cakes were a hit. So this year I wanted to make some more. Especially because I was planig to have breakfast with some of my friends the saturday before easter. They make great gifts. Especially for kids, I have it on good authority that they like them just as much as the adults.
First I was planing to bake 30 eggs, but then I had a closer look at the recipe and realised that it would be more advantageou s to make 40. 
It's a good thing that this time I could use a small drill to make the holes or I would have spend a few hours on that alone. I had this idea that I could drill perfect little holes into the shells. Of course that didn't work out. For smaller holes it worked great, but as soon as I tried to make them bigger, the shell started to break. In the end I had the same result as if I had just used a finger to make the hole bigger, just with more work.

At the begining of the year I made my own extracts. And the eggs were a perfect opportunity to try them out. I made four varieties. Lemon, lime, mandarine and mint. I also used vanilla extract, but it's store bought (for one it's cheaper, for another it's the only extract you can actually buy in a supermarket here in germany). It was kind of funny, cause after the baking the eggs were all mixed up and you always had to guess which flavor it is you were just eating. 


Sometimes I can't eat the things I baked. Mostly because of the smell during the baking. The kitchen had this buttery smell the hole time I was cooking. I was kind of sick of it after the three of four hours I had to smell it non-stop. I ate one that same evening to see how they looked on the inside and that was it for the next four days. But when I came back after easter I ate the six eggs I left at home (they broke while I was cleaning them after baking). They were absolutely delicious. Way better then the one straight out of the oven. 
That's why I would recommend to make them two or three days before you plan on eating them. Just don't store them in the fridge, the cold dough won't be as fluffy. Just put them in an airtight container. 

And one last pointer. Don't peel the hole shell of when you want to eat it. Just make the hole at the bottom a little bigger and than spoon it out. Just as you would do with a soft-boild egg.

_____________________________________________________

Easter Egg Mini-Cakes 

Cake Batter

1 1/2 cups flour
3/4 tsp baking powder
3/8 tsp baking soda
1 pinch salt
1 1/2 cups sugar
150 g butter, soft
200 g sour cream
3 eggs

1. Sift the flour, the baking powder, the baking soda and salt together.
2. Blend the sugar and eggs with a hand mixer till the mass is pale and creamy.
3. Add the butter to the batter and blend it well.
4. Add the flour mixture and blend everything together.
5. Add the sour cream to the batter and blend it.
 

Cream Cheese Batter 

2 egg
360 g cream cheese
1/2 cup sugar
yellow food coloring
red food coloring
7 tsp extract of your choice

1. Blend the egg, the cream cheese and the sugar with a hand mixer together.
2. Add the food coloring until the batter resembles egg yolk.
3. Add flavour of your choice. Mix in well.
 

To Assemble

40 eggs, hollowed
40 strips kitchen foil, ca. 10 cm wide

1. Carefully drill a small hole into the bottom of the eggs. Preferably use some kind of sharp metal skewer. Widen the hole with a corkscrew bottle opener or something similar. In the end the hole should have a diameter of about 2 cm.
2. Scoop out the eggs. A wooden skewer is rather helpful with that. You should save five of the eggs separately. Three for the cake batter and two for the cream cheese batter. The rest of the eggs can be put together and used for something else.
3. Wash the egg shells out with warm water.
4. Keep the egg shells for 30 minutes in salt water.
5. Rinse the egg shells with cold water. Place the shells with the opening down on some kitchen paper and leave them for at least 10 minutes.
6. Dry the shells in the microwave. Do it 3-6 times, for 12 seconds at a time. Open the door between each time.
7. Tear 40 strips of kitchen foil. They should be roughly 10 cm wide.
8. Crumple up the foil and put one each in the hollow of the muffin pan. It should be formed in such a way that the eggs can stand on their heads without falling.
9. Place the egg shells in the muffin pan with the hole facing upwards.
10. Pre-heat the oven to 180°C/360°F.
11. Put the cake batter into a piping bag.
12. Fill each egg to 1/5 with the cake batter.
13. Fill each egg to 2/5 with the cream cheese batter. The batter will be to fluid for a piping bag, so just carefully pour it with a spoon.
14. Fill each egg to 3/5 with the cake batter.
15. Bake the eggs for 20-25 minutes. During the baking some of the batter will flow out of the eggs. When the batter has a gold brown coloring it should be ready.
16. Let the muffin pan on a cooling rack for about 5 minutes. Afterwards take the eggs out of the pan and let them cool down to almost room temperature.
17. With a small knife carefully scrape the overflowed batter from the eggs. Don't cut all the batter at the hole of. Delicately wipe down the shells with a wet paper towel.
18. Color the eggs with an easter egg coloring which doesn't require for the eggs to be dipped in water or something similar.
19. When the color is dry cut of the rest of the overflowed batter or which has some color on it.

Tip: You will save time if you work with two muffin pans. You can prepare one while the over is in the oven. That way the second can go in immediatley when the first comes out.


Bon appétit!!

Dienstag, 31. März 2015

Blueberry Biscuit Cake


In Wiesbaden you can find the gorgeous Café Maldaner. I absolutely love it. Not only the delicious cakes but also the atmosphere. It's more than worth a visit.

One of my favorite cakes is the Blueberry Biscuit Cake. I liked it so much that I wanted to make one myself. I already had a tasty biscuit recipe from my aunt. So I only needed the blueberry topping. It wasn't so easy to find one. Somewhere along the way I stumbled over these recipe. It came pretty close to what I was looking for.

The recipe works with fresh or frozen berrys. The first time I tried it out it was summer so I made it with fresh blueberrys. It was for my aunts birthday. Everything worked how I planed it. The taste is of course not exactly like the one from Café Maldaner. But it's still delicious.
I changed the recipe a little bit after the first try. For one I made more of the topping. That way there is a better balance between the biscuit and the blueberrys. For another I left out the shortcrust. It was too sweet for my taste.

On the second try I made it with frozen blueberrys. At first I used the same, already changed, recipe. But while cooking the topping I realized that it was too runny and wouldn't firm up. I had to add more cornstarch and cook it again. But it was worth it. It held perfectly when I took of the cake ring the next day.

The fresh and frozen berrys aren't interchangeable. The result is pretty different. In taste and appearance.
And I got to say the frozen blueberrys were pricier than the fresh. But you only get fresh berrys in the summer while you can buy frozen blueberrys all year round.

All in all I liked both variations.
Maybe next time I try it with raspberrys or a berry-mix.


_____________________________________________________

Blueberry Biscuit Cake

Biscuit

150 g flour
38 g cornstarch
188 g sugar
315 g eggs (with shell)
1 pinch citric acid powder

1. Weigh the eggs with the shell. Try to come as close to the intended weight as you can. That works best with a mix of medium and large sized eggs.
2. Separate the egg whites from the yolks.
3. Put the egg whites in a tupperware container, close it. Put the container in the freezer. Leave it there until the egg whites are a little bit frozen on the edges. This can take from 15-50 minutes. You should check every 5-10 minutes.
4. Beat the egg yolks with a hand mixer until they turn pale. Put a piece of saran wrap directly on the beaten yolk. Put the bowl in the fridge for later.
5. Mix the flour with the cornstarch. Sieve the mixture at least twice. Leave the flour in the sieve for later.
6. Put the sugar into a small bowl and leave it for later.
7. Take a baking pan but leave out the bottom. Put a cake-strip around the pan.
8. Put baking parchment on a baking sheet. Place the ring of the baking pan on top. Crush the edges of the parchment around the ring.
9. Pre-heat the oven to 155°C/310°F.
10. Prepare the flour, the sugar, the yolk and a timer for easy access.
11. Put the citric acid powder in a big bowl.
12. Add the egg whites.
13. Whip the egg whites manually. Preferably use a spiral whisk or a normal whisk, if you don't have one. It's important that you don't turn the bowl while you whip the eggs and you always have to beat in the same direction. Basically you have to repeat one hand movement the whole time.
14. After 10 minutes start gradually adding the sugar. Overall the egg whites should be whipped for 25 minutes.
15. Afterwards add the egg yolk.
16. Sieve half of the flour to the whipped egg whites. Fold them in carefully but quickly. Sieve in the remaining flour and fold it in too. Like with the egg whites you should not turn the bowl and fold in the same direction. Try to work quickly but always be careful.
17. Put the batter into the prepared pan. Smooth out the top as good as you can.
18. Bake for 50-60 minutes. When you press the top carefully with a finger and it jumps back, the biscuit is finished.
19. Put the baking pan on a cooling rack and leave it to cool down completely.
20. Remove the parchment. Afterwards use a thin knife to carefully cut the biscuit out of the pan.


Blueberry Topping

Fresh Blueberrys

1,1 kg blueberrys, fresh
1 1/2 cups water
1 cup sugar
4 1/2 tbsp cornstarch
1 1/2 tbsp lemon juice, freshly squeezed
21 g butter

1. Wash the blueberrys.
2. Put 1 1/2 cups of the blueberrys, the sugar, the cornstarch and the water into a medium sized sauce pan. Carefully, so you don't squish the blueberrys, mix everything together.
3. Bring the mixture to a boil.
4. Boil it for about 2 minutes while constantly stirring. It will become thicker.
5. Add the butter and the lemon juice and stir them in.
6. Take the pan of the stove. Leave it to cool down a little until it's just warm. It takes about 30-40 minutes.
7. Add the remaining blueberrys and cautiously stir them in.

Frozen Blueberrys

1 kg blueberrys, frozen
1 1/4 cups water
1 cup sugar
5 1/2 tbsp cornstarch
1 1/2 tbsp lemon juice, freshly squeezed
21 g butter

1. Put the blueberrys in a colander and let them thaw. It works best if the berrys thaw in the fridge over night.
2. Put 1 1/2 cups of the blueberrys, the sugar, the cornstarch and the water into a medium sized sauce pan. Carefully, so you don't squish the blueberrys, mix everything together.
3. Bring the mixture to a boil.
4. Boil it for about 2 minutes while constantly stirring. It will become thicker.
5. Add the butter and the lemon juice and stir them in.
6. Take the pan of the stove. Leave it to cool down a little until it's just warm. It takes about 30-40 minutes.
7. Add the remaining blueberrys and cautiously stir them in.

To Assemble

1. Cut of a bit of the biscuit to level the top.
2. Put the biscuit on a serving plate.
3. Put a cake ring around the biscuit. Make sure it's as tight as it goes.
4. Pour the blueberry topping on it. Smooth out the top.
5. Leave the cake in the fridge until the topping becomes solid. Best would be over night.
6. Carefully release the cake ring.


Bon appétit!!

Dienstag, 24. März 2015

Lemon Thumbprints


The original recipe is for Orange Thumbprints. But when I went to buy the ingredints the oranges didn't look so good but the lemons were great. So I took them instead. I was pretty satisfied with the end result.
Other then the Orange Thumbprints the filling for the Lemon Thumbprints is a lot paler.
I found the filling a little dull. So I changed the recipe to intensify the lemon taste and make it a little sourer.
The cookies were good when they were fresh but I liked them a lot more the next day. So it's a good recipe to make beforehand.

When I was visiting my family I made them the Orange Thumbprints. Mostly because they had some oranges lying around and all the other ingredients are of the kind that you always have at home. I started rather late and then I stalled for longer and longer to finish the cookies, until it was almost evening. And I really wasn't in the mood anymore. So I finished them the next morning. The dough was still great. 

I liked both the Orange and the Lemon Thumbprints. I want to try it with limes next time, see how that works out.

_____________________________________________________

Lemon Thumbprints

Dough

225 g butter, room temperature
1/2 cup sugar
2 egg yolks size L, room temperature
1 tsp vanilla extract
2 1/2 cups flour
1 tsp salt

1. Mix the butter and the sugar with a hand mixer until it's light and fluffy.
2. Add the egg yolks and the vanilla extract and mix it for about 1 minute.
3. Slowly add the flour and the salt. Mix the batter until it is entirely incorporated.
4. Form the dough into a 1-2 cm thick square sheet and wrap it in plastic wrap.
5. Store the dough in the fridge for at least 1 hour. The dough can stay there for up to 24 hours.

Filling

1/3 cup sugar
1 tbsp flour
1 egg size L, room temperature
2 tsp lemon zest
2 tbsp lemon juice
1/8 tsp salt
1/8 tsp lemon extract, optional
1 pinch citric acid, optional

1. Whisk the egg with a fork.
2. Add the sugar and flour and whisk everything together.
3. Add the lemon zest, the juice, the salt and possibly the lemon extract and citric acid. Whisk it all together.

To Assemble

1. Pre-heat the oven to 180°C/360°F.
2. Put baking parchment on a baking sheet.
3. Take the dough out of the fridge. Cut it into even squares, each should be the size of about 2 tsp dough.
4. Form balls out of the squares. Place them on the baking sheet, leave about 2 cm between the balls.
5. Use the end of the handle of a wooden spoon or something similar, it should be round and flat, and carefully press it into the dough balls to make small wells. Try not to break the sides, better to leave them a little shallow.
6. Bake the cookies for about 10 minutes.
7. Use the spoon again to make the wells deeper.
8. Carefully fill the wells to the top.
9. Bake the cookies for another 10 minutes, the edges should be a light brown.
10. Leave the cookies on a cooling rack to cool down.

Bon appétit!!

Sonntag, 1. März 2015

Marble Cheesecake


This is one of the cakes I made for my fathers birthday. I combined three different cheesecake recipes and changed them up a lot.
I thought it was ok, but I'm generally not that big a fan of cheesecakes. But my father likes them so I made one anyway. Everyone else thought it was good, so I count it as a win. Only my mom complaind a little, because she didn't like the chocolate cheesecake. She prefers her baked good chocolate free. I don't get it.

I didn't want to make the bottom out of cookie crumbs. That's so boring and not one of my favorite pastries. I searched around a little and found this brownie bottom. It paid off. It was my favorite part.

I used a square form. Mostly because the other cake I made was round and I wanted something different. But I will write the recipe for a round form. The only difference is how you prepare the baking pan anyway.

You can't eat all that much of it. The cream cheese makes it rather heavy. But maybe it's better this way.

_____________________________________________________

Marble Cheesecake

Brownie Dough

85 g butter
85 g chocolate, bittersweet
3/4 cup sugar
2 eggs
1/4 cup milk
3/4 cup flour

1. Use a round baking pan, but leave out the bottom. Grease the sides with butter.
2. Put baking parchment on a baking sheet. Place the ring of the baking pan in the middle. Press the sides of the parchment to the outside of the ring.
3. Cut of a strip of baking parchment, it should be as high as the ring. Place it on the inside of the pan.
4. Pre-heat the oven to 175°C/350°F.
5. Put the butter and the chocolate in a sauce pan and melt it on low. Stir constantly.
6. Put the sugar in a bowl. Take the pan of the stove and add the chocolate to the sugar. Mix it together.
7. Leave it to cool down for about 5 minutes.
8. Add the milk and the eggs. Use a hand mixer on medium speed to mix everything together.
9. Stir in the flour.
10. Spreed the dough into the prepared baking pan.
11. Bake for 25 minutes.

Light Batter

880 g cream cheese, room temperature
1 cup sugar
1/4 cup flour
1/2 cup sour cream
1 tsp vanilla extract
3 eggs

1. Soften the cream cheese.
2. Add the sugar, the flour, the sour cream and the vanilla extract and mix it together.
3. Add the eggs individually and blend them in.

Chocolate Batter 

50 g chocolate, bittersweet
100 g cream cheese
1/4 cup sugar
1/8 tsp salt
1/8 sour cream
1 tsp vanilla extract
1 egg

1. Chop the chocolate roughly.
2. Melt the chocolate in a double boiler.
3. Soften the cream cheese.
4. Add the sugar and mix it in.
5. Add the salt, the sour cream and the vanilla extract and blend everything together.
6. Add the egg and mix it in with a hand mixer on low speed. Don't over mix.
7. Add the chocolate and mix it in.

To Assemble

1. Pre-heat the oven to 175°C/350°F.
2. Put blobs of the two different batters on the brownie dough.
3. Pass a fork through the batter to create a marble effect. Don't overdo it or you only get light brown batter.
4. Bake the cake for 45 minutes.
5. Reduce the heat to 165°C/325°F.
6. Bake for another 60-70 minutes.
7. Shut down the oven. Leave the cake for about 1 hour in the oven with a tilted door.
8. Put the cake on a cooling rack and leave it to cool down completely.
9. Put the it in the fridge for at least 8 hours.
10. Detach the baking pan and parchment before you serve the cheesecake.

Bon appétit!!

Montag, 23. Februar 2015

Chocolate Pear Turnover


A friend and I were baking cookies. I wanted something special. So I looked through my whole online bookmarks regarding Cookies. It's a long list. And I found these.
These cookies are really prestigious. And they taste great.

Some of the dough was left over. I just made some medallions. They were tasty too. Simple but still good. Because of the cacao the dough is really dark, in taste and color. As soon as I find a good filling I will make my own Oreos with these recipe.

_____________________________________________________

Chocolate Pear Turnover

Dough

125 g butter, room temperature
200 g flour
50 g cacao
1 egg
125 g sugar

1.  Use a fork to "cream" the butter.
2. Add the flour and the cacao and blend everything with your hands until it's crumbly.
3. Make a well in the middle and add the egg and the sugar. Use your hands to blend the dough until it's smooth.
4. Form a Ball out of the dough and wrap it with plastic wrap. Put it for at least one hour in the fridge.

Filling

400 g pears
1/4 cup water
20 g hazelnuts, ground

1. Peal and core the pears. Afterwards cut them into small cubes.
2. Put the pears with the water in small sauce pan and bring it to a boil.
3. Reduce the heat to low. Cover the pan with a lid and leave it to simmer for about 1 hour. Stir occasionlly.
4. Take of the lid in the last 15-20 minutes. So the water can vaporize.
5. Heat a skillet and toast the hazelnuts in it for about 2-3 minutes.
6. Use an immersion blender to blend the pears.
7. Press the pear mash through a fine sieve. You need about 125 g.
8. Add the hazelnuts and blend everything together with a fork.

To Assemble

1 Egg

1. Put baking parchment on a baking sheet.
2. Unwrap the dough. Roll it out on lightly floured surface.
3. Cut out circles with a 8-10 cm big diameter.
4. Put about 2 tsp pear mash on the circles and fold them to half moons. Use your fingers to squeeze the edges together. If some dough is left over, form small medallions.
5. Place the turnovers on the baking sheet.
6. Pre-heat the oven to 180°C/360°F.
7. Whisk the egg in a small bowl.
8. Brush the cookies with the egg wash.
9. Bake the turnover for about 15 minutes.
10. Leave the cookies on a cooling rack to cool down.

Bon appétit!!